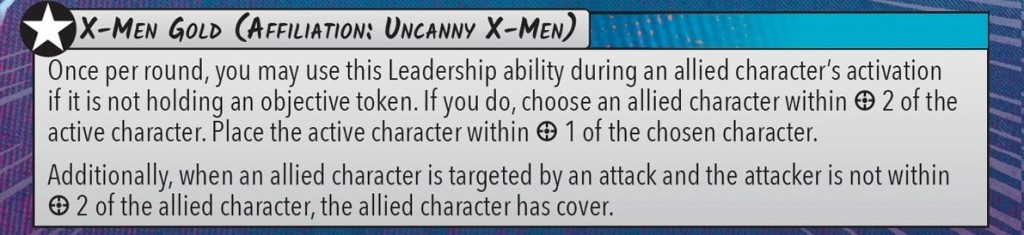
Storm’s Leadership, X-Men Gold, is one of the better leaderships to enable turn 1 scenario plays and today we are going to see what it can lead to on B shaped and D shaped secures.
First, a reminder as to what the leadership does.
Being able to place a character within R2 to R1 of another is the part that we’re most interested in for this artcile. Depending on the size of the bases used (35mm for small, 50mm for medium and 65mm for large) it can also drastically augument the reach.
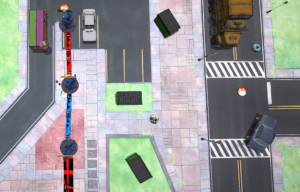
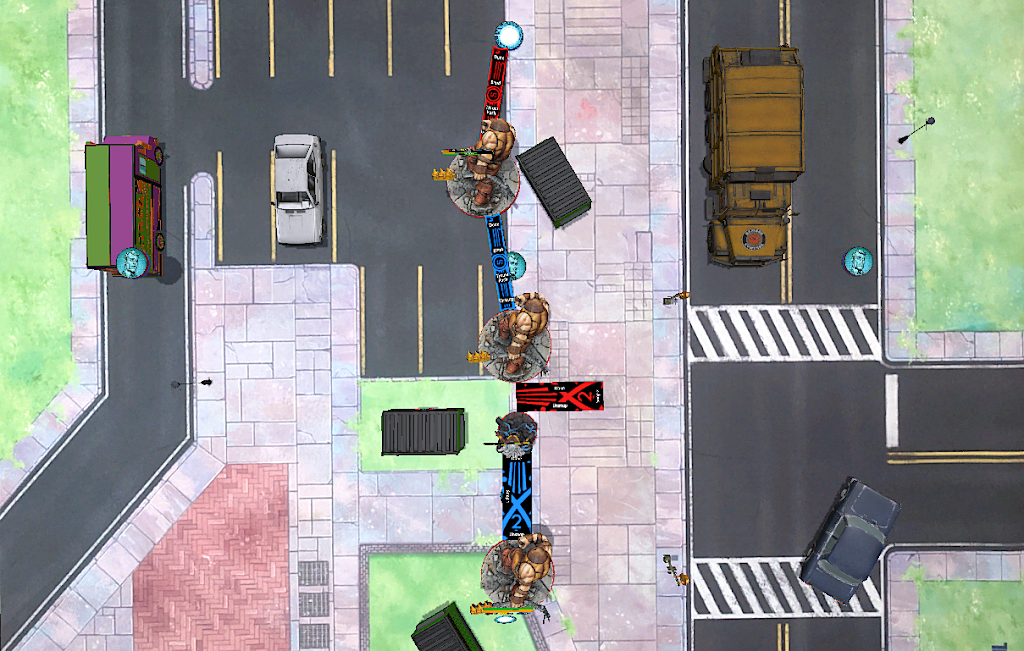
Let’s look at practical applications on Mutant Madmen, a B shaped secure. For this example, I’ll be using Juggernaut, but it works with any large base characters or medium based characters with at least a medium move (like Beast for instance)
As we can see, with a character standing R2 in front of Beast (that also places them on a B secure on your side) he can move an already be in range of the opposing B point with one action left. Beast is a noteworthy character to use for this line of play because, thanks to the Tactics Card First Class, his first interaction is free which means that, with his last action, he can strike and if he either deals at least 1 damage or roll a Skull, he can throw a size 2 character with his superpower Baser Instincts before trying to flip the Mutant Madmen Trap. This is important because even if your opponent had 2 characters on the point before Beast’s activation, if you manage to throw one of them before rolling, thanks to his 4 physical defense, he still has a 50% chance to secure the trap.
Going on an opponent’s B secure does not require the use of the leadership, characters with at least a medium base with a medium move or a small base and long move can also accomplish something similar.
Having an affiliated character be able to move and contest an opposing B secure without using the leadership works great because it allows X-Men to use it to do something similar to what we saw with Beast on the other side, meaning that X-Men could theoretically contest or control all four B secures by the end of round 1.
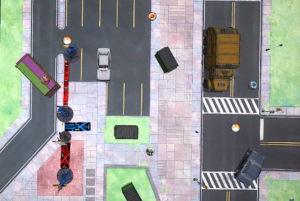
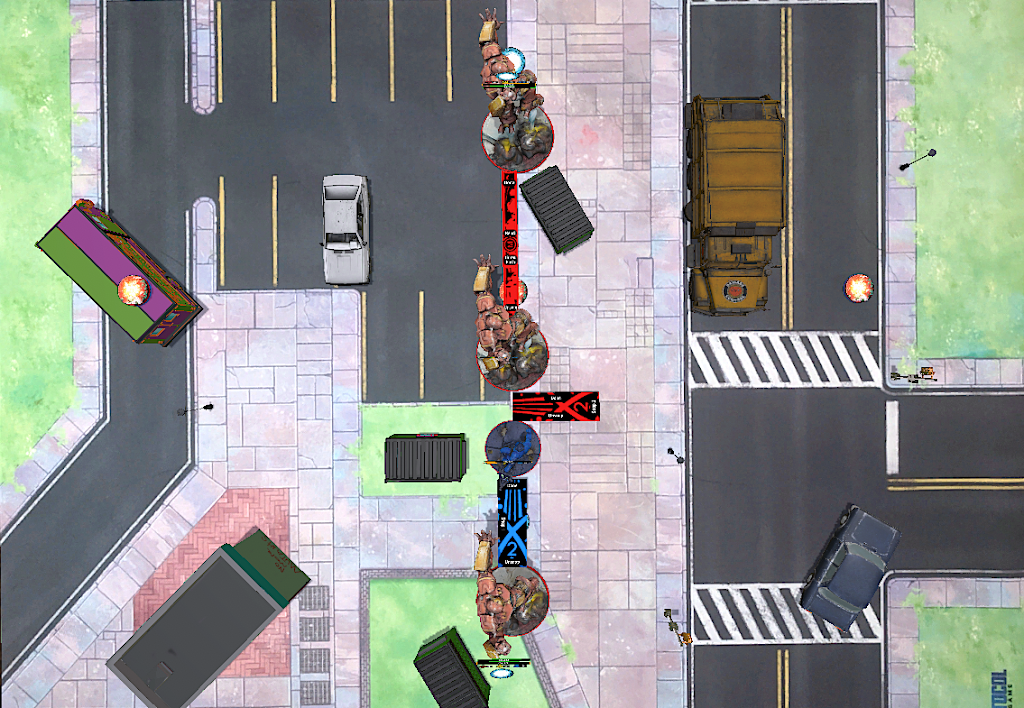
One of the most impressive characters that can threaten an opposing B secure with X-Men Gold is, in my opinion, Juggernaut.
As we can see, using the leadership to place Juggernaut within R2 of another character, he can do a single small move and already be standing of the opposing B secure, leaving him with one action left and 3 power, which means he can do a single 8 die attack that can push on a wild and use his signature card; Do You Know Who I am? to throw a model standing on the secure long (which puts them behind their deployment line).
Having two models that can threaten the opposing B secures can put significative scenario pressure on the other team, putting the onus on them to solve the problem.
Now let’s take a look at D shape secures and see some possibilities unlocked with X-Men Gold.
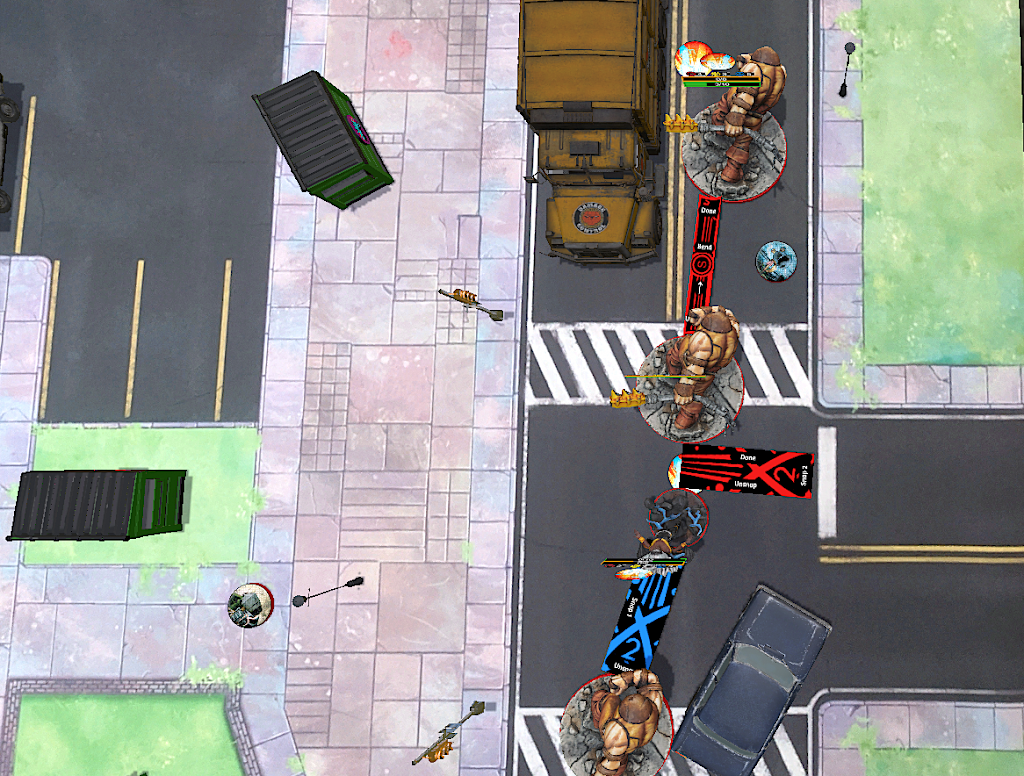
With a 65mm base (large) deployed directly in front of the D secure on your side (which means they should be contesting the point), if you place a 50mm (medium) character within R2 (still contesting the secure) and jump, you can have that 65mm base character already be contesting a central objective before they use any of their actions. As we can see with Juggernaut, he can make a single move, followed by his superpower: Nothing Stops the Juggernaut to get directly to the opposing D secure and have an attack left. Using a 35mm (small) base still lets your 65mm base models get to the opposing D secure, but not contest or grab an objective on the central line.
Another option to threaten the opposing D secure, is to have a character on a 65mm base (large) with a Medium movement use X-Men Gold to go over a 50mm base (medium) that’s placed at maximum R2 in front of them. It allows the 65mm base model to get to the opposing D secure in a single Medium movement (or charge in the case of characters like Malekith or Hit and Run for Hulkbuster) which even leaves them with another action afterwards.
This should give an idea of how far the jump provided by X-Men Gold can carry a model and the scenario reach your team can have as soon as round 1. I encourage anyone to try these strategies for themselves and see how they fare.
Thank you for taking the time to read this piece, please feel free to leave a comment and as always, don’t forget to have fun!


The movement measurement pieces are very helpful, thanks!