Welcome back to another edition of strategic initiative, where I’ll delve into opening secure focused plays under X-Men Gold. I’ll be going over the recently added G and I shapes and what the Children of the Atom can do with them.
Before we begin, a reminder of what we’re working with.
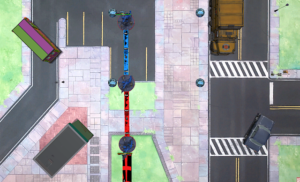
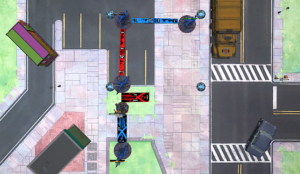
Storm’s leadership lets you place a character within R2 to R1 of another is the main tool we’ll be leveraging to get an advantage on the scenario. The G shape works somewhat similarly as the B shaped scenarios except that the secures are significantly closer to each other.
A 35mm base character can, with one medium movement get to the console that’s closer to your deployment line, but not quite reach the one on the opposite side of it. Magik being a notable exception to that as, with Limbo Step, she can reach the back console with two movements.
A character with a long move can get to any console in two movements from their deployment line. If they’re already in range of the secure, they can get to any other one in a single move action provided they are positioned to do so. A long moving character deployed in the center of the board, can reach any of the points if needed.
As we can see in this example, Mystique can get to any of the four secures from her deployment line reasonably well. Now with a 50mm (medium) base medium mover like Beast, you can get to both secures on the same side without any help.
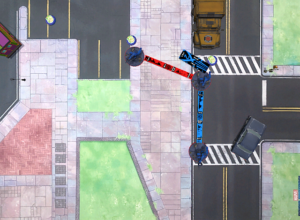
With First Class, an affiliated X-Men character on a 50mm base with medium movement, like Beast, can interact with two points as early as turn 1 without the need to use the X-Men jump.
Now that we’ve seen what characters can do without using X-Men Gold, let’s take a look of what they can do with it. As covered earlier, the X-Men jump will help a 35mm (small) base character reach the secure directly across from their starting position, but with a 50mm (medium) base character can get to the first console from their deployment zone. For a 35mm base character to serve as an effective pivot for a 50mm base, they would have to be off the Secure closest to them. This is not the case for a 50mm or 65mm (large) base character as their base size lets them both serve as a pivot to use the X-Men jump on and stay in range to contest. With First Class and a pivot, a medium moving, 50mm base, affiliated character can interact with both opposing secures of a G map on round 1.
With both long moving models and the X-Men jumps to threaten all secures on a G shape is significant as it lets you put substantial scenario pressure very early on.
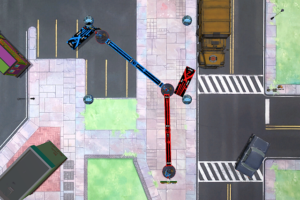
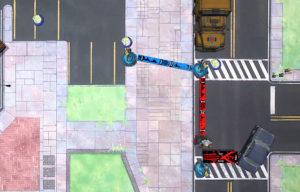
Now let’s move onto the I shape. The I shape is somewhat similar to the C shape except the secures are placed on a diagonal.
From the secure closest to your deployment line, any character that has either a long move or is on a 50mm base with at least a medium move will be able to get there in a single move action. Since the secures are close enough apart, it also lets them move from the one closest to your deployment to the central one in a single medium or longer movement.
A similar result can be achieved by a character with a small base, provided they use the X-Men jump, as seen with Magik going over Storm as it lets Magik move to or contest both the secure that’s close to your deployment and the central one. This also means that with a medium move, a 35mm base character is able to contest and interact with the central secure if the use the X-Men jump directly from their deployment.
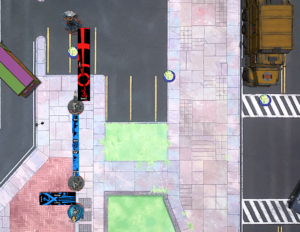
A 35mm base character with a medium movement will also be able to reach the furthest secure from their deployment line by moving twice. It’s also worth noting that, with the jump, characters with R3 attacks that provide a form of movement like X-23 (with her spender) and Logan (with both of his attacks), are able to perform an attack and use the additional movement or place to finish within R1 of the objective token.
This should give an idea of what the Uncanny X-Men is capable of on both G and I shapes with and without the help of X-Men Gold. I strongly encourage you to try these strategies and take the time to explore some setups to see how they go.
Thank you for taking the time to read this and as always, don’t forget to have fun!