


Welcome back to SGP.
Today another rules post. We go through all 22 crisis cards in the game and mark stuff that maybe isn’t obvious about them and common mistakes. If you’ve come here hoping for strategy tips on which crisis cards to run please look at this article:
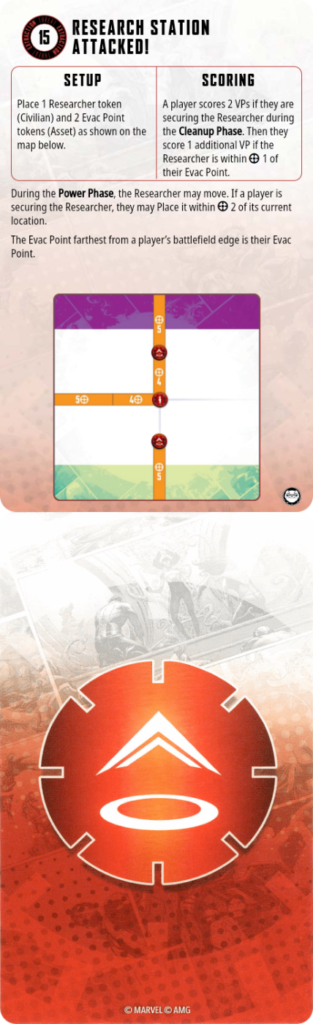
Map: E
Important about the Researcher are four things:
He is an extract but can’t be picked up. But both the SHIELD Agents and the Hand Ninjas can score him because he specifically isn’t a secure.
He is moved in the power phase so it doesn’t matter who scored him in the clean up phase before, you have to check who is securing him now in the power phase.
The Evac Points do count as objective markers for leaderships that care about them like M’Baku, MODOK, Scientist Supreme or Red Skull Master of Hydra.
And lastly and least important and common: You have to bring the Researcher to the Evac Point on your opponents board edge, not your own, to score the extra VP. Importantly non of your characters have to contest the Evac Point to score it.
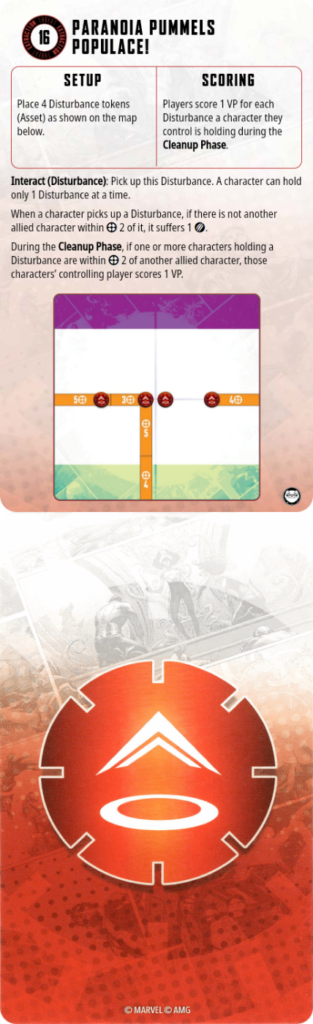
Map: K
Dazed allied characters in range 2 of someone picking up a Disturbance do prevent the damage but they don’t help to score the additional VP as dazed characters can never contribute to scoring.
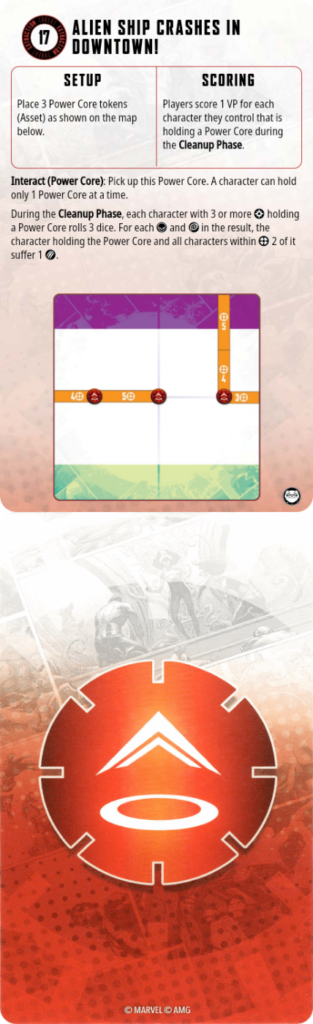
Map: C
You don’t explode automatically when you have 3 power during the Cleanup Phase while holding a Power Core. You roll for each character that has one and is above 3 power. And of course it happens before you gain power from next rounds power phase.

Map F
The player with priority rolls for all their models and then the player without it. Also if you ever run into this crisis ask your opponent why s/he hates fun.

Map F
A character can hold multiple cubes but also takes multiple damage (and gains multiple power ) if it does.
The power and damage happen in the clean up phase after scoring VP. So you can daze in the cleanup phase but don’t loose an activation to it.
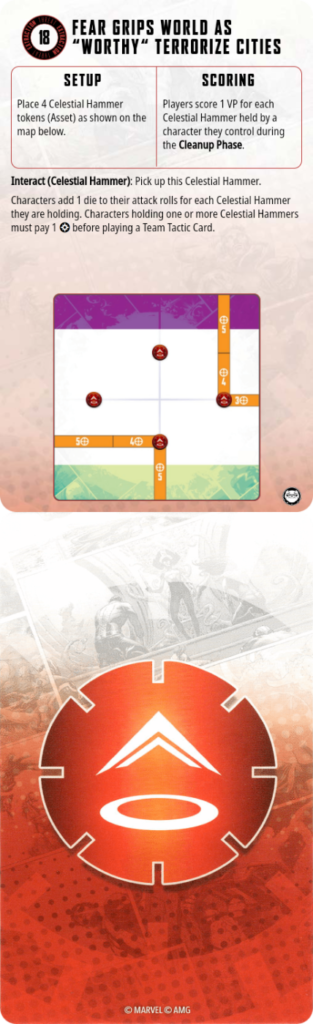
Map D
Characters can hold multiple hammers. Regardless of how many hammers they have they have to pay 1 power before playing a team tactics card.
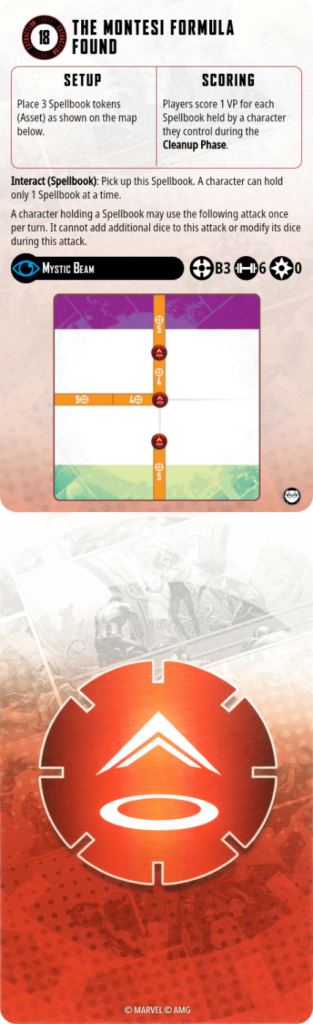
Map E
Not being able to add dice to the attack roll, when you use the Beam the Spell book provides, includes not being allowed to explode your crits.
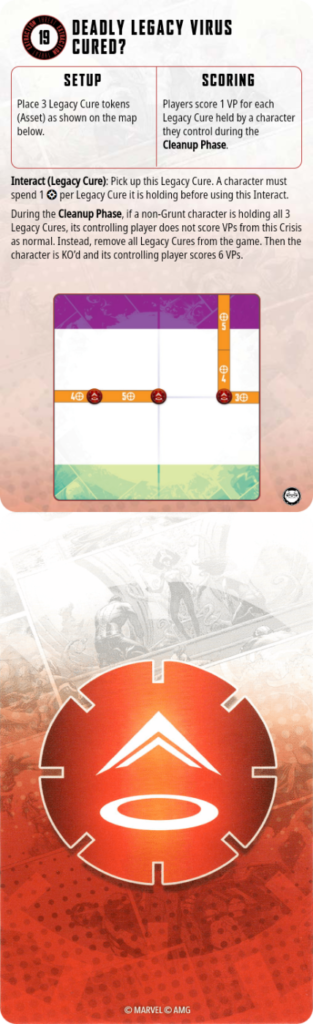
Map C
If the character holding all three Cures is your last one and KO’s in the cleanup phase you loose the game for being tabled before you score the 6 VP. This isn’t optional. If a character has all 3 cures you cannot score any VPs from them before the model is KO’ed.
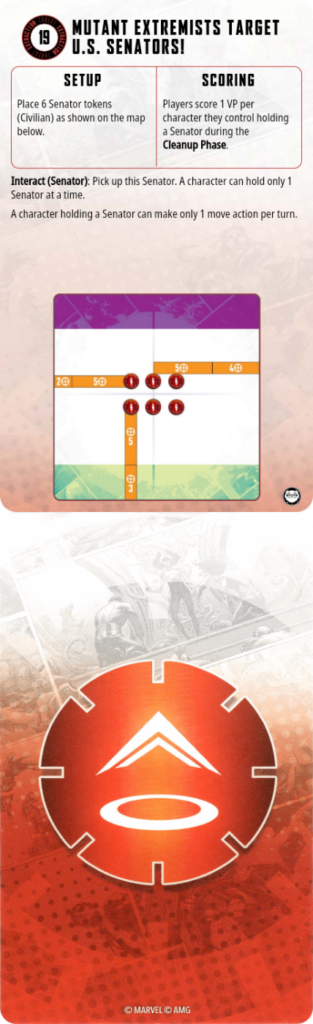
Map K
Movement actions taken in a turn before having picked up a Senator still count to the limit. So it impossible to move, pick up, move again.
Any movement that doesn’t specify being a movement action is unaffected by this. So places and sometimes advances can still be taken. Uliks Crushing Leap is an example of an advance (+place) that still works normally despite carrying a Senator. Any Charge or Hit and Run specifies taking a movement action and is thus affected by the limit.

Map J
The dice roll is irrelevant in wether or not you pick up the Skrull. If you don’t meet the requirements your opponent pushes your character (that is now holding that Skrull) S.
Map E
Not a lot is played wrong here usually.
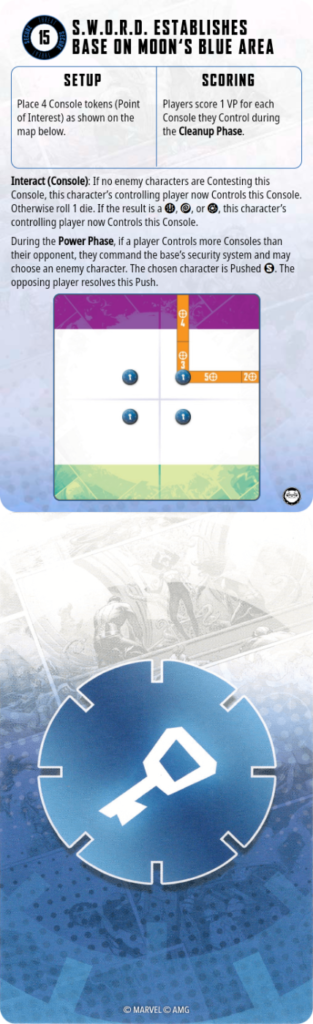
Map G
This is a “Pay to Flip” so you need to interact with and control the Console to score VPs from it. Contesting it is irrelevant for scoring.
Unlike other Pay to Flips SWORD Base doesn’t care about enemy characters contesting the secure being healthy. So injured characters count for that rule as well.
It is also the only Pay to Flip that doesn’t require any roll of there are no enemy characters contesting the point.
The player who controls more Consoles during the power phase gets to push an enemy model anywhere on the board.
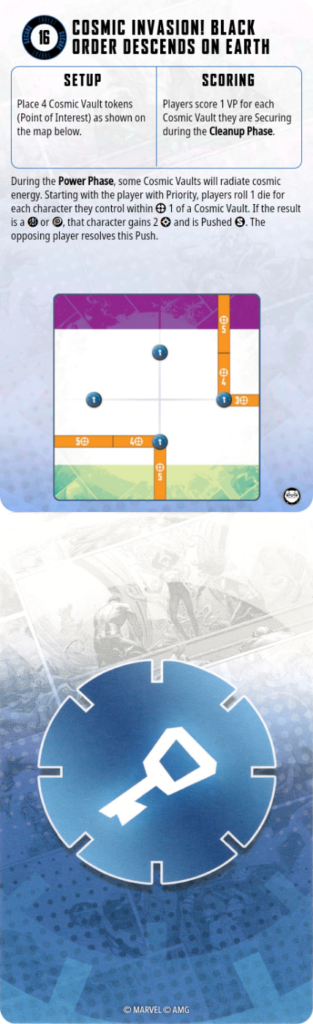
Map D
The first power phase of the game does count for this objectives special rules. Any big base (65mm) model set up directly behind the near secure is contesting it immediately. Thus they would have to roll if they get pushed at the very start of the game.
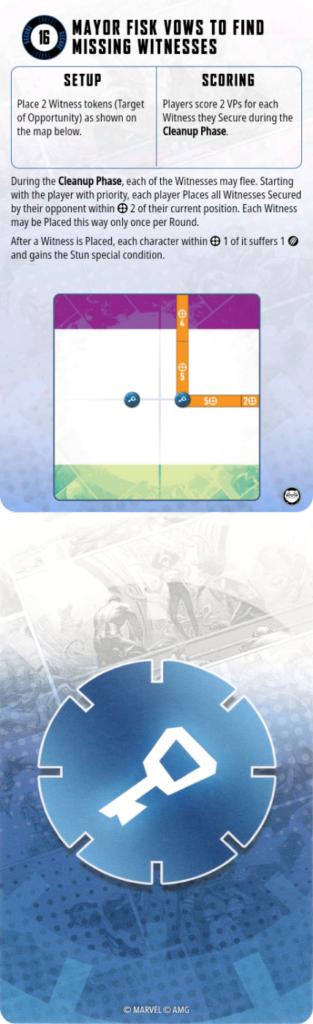
Map H
The player not securing the Witness is allowed (not forced) to place the Witness to within 2 of it’s current location. Only if it is placed it hands out damage and Stun. You can decide to pick it up and place it at exactly the same location of you want to since it is within 2 of its former location that way.
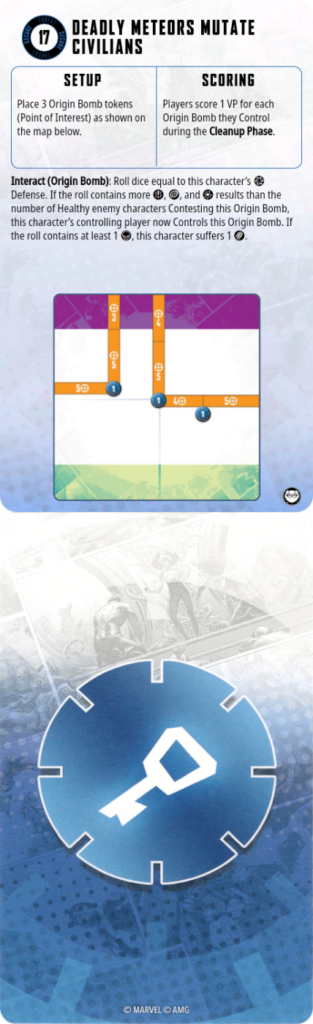
Map I
This is a Pay to Flip.
You only suffer 1 damage if you have any number of Skulls in your interact roll.
Taking damage from the interact roll doesn’t stop you from controlling the Origin Bomb if you’ve had enough successes in the roll despite the Skull(s).
Map B
There isn’t really anything to play wrong here. A good crisis for teaching the game.
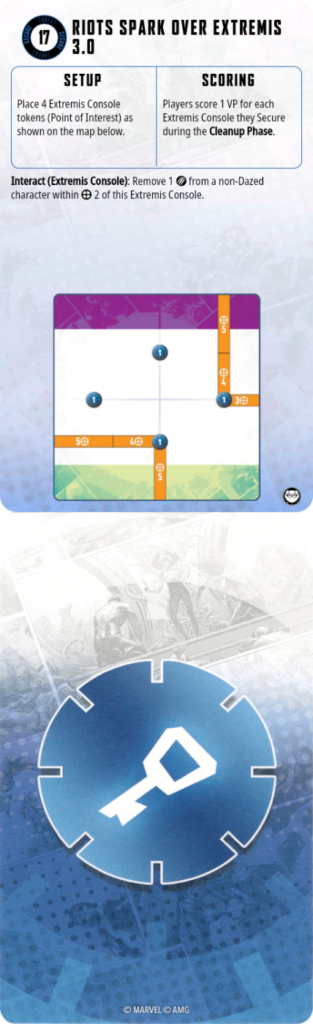
Map D
Despite having an interact ability this crisis is not a Pay to Flip. You have to secure the tokens to score VPs from them.
The interact can be used to heal an allied character in range, not just the model interacting itself.
If you can reach them you can interact with multiple tokens in a single activation (but never more than once per token). This is generally true for every crisis not just here.
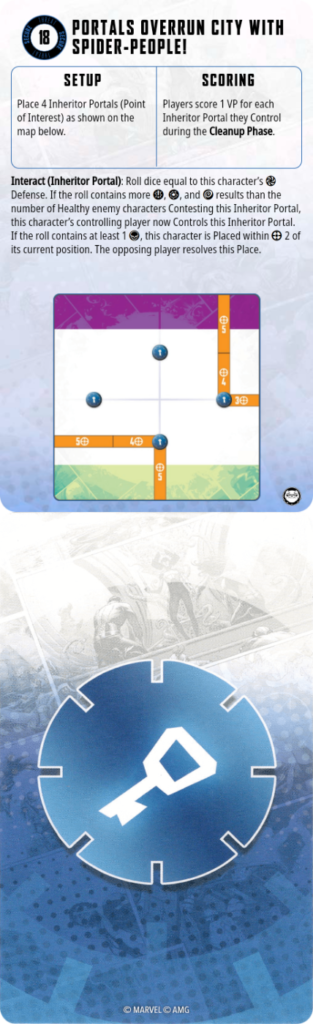
Map D
Why? Why would anyone ever want to play this?
It is a Pay to Flip. Getting placed when you roll a Skull in the interact doesn’t hinder you at controlling the Inheritor Portal if you’ve had enough successes despite the Skull.
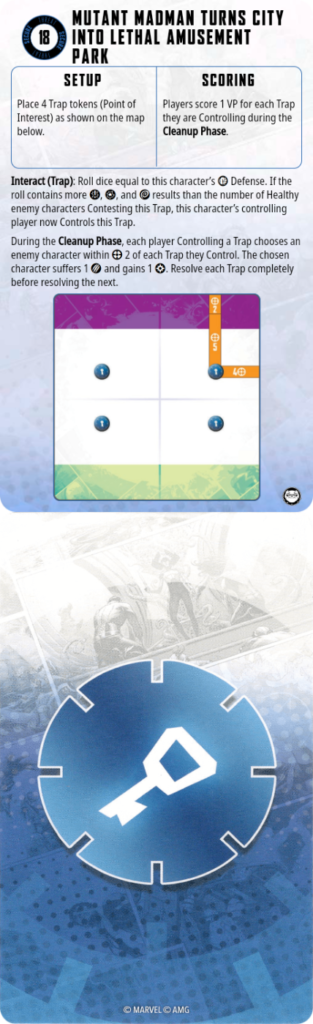
Map B
This is a Pay to Flip so you have to interact with the secures to score them.
The damage from the madman traps isn’t optional, you have to do it wether you want to or not.
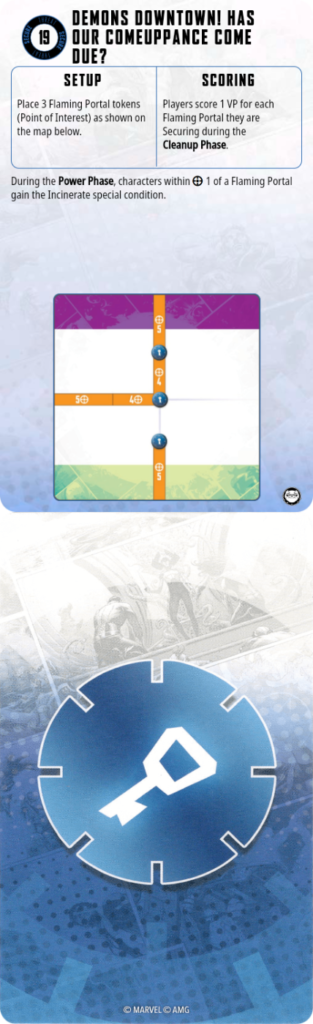
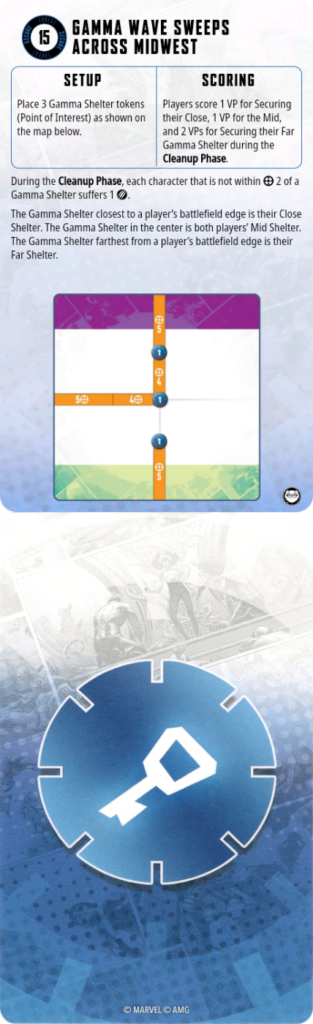
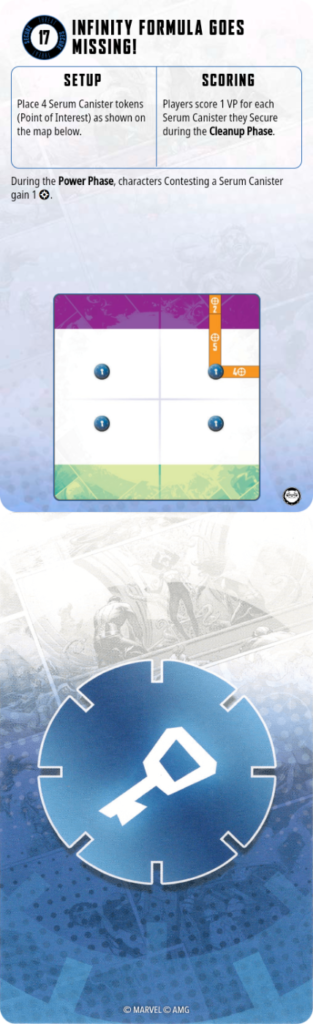
Map E
You gain the incinerate in the Power Phase so waking up from being dazed doesn’t help you get rid of it, if you are still in range to contest one of the points.
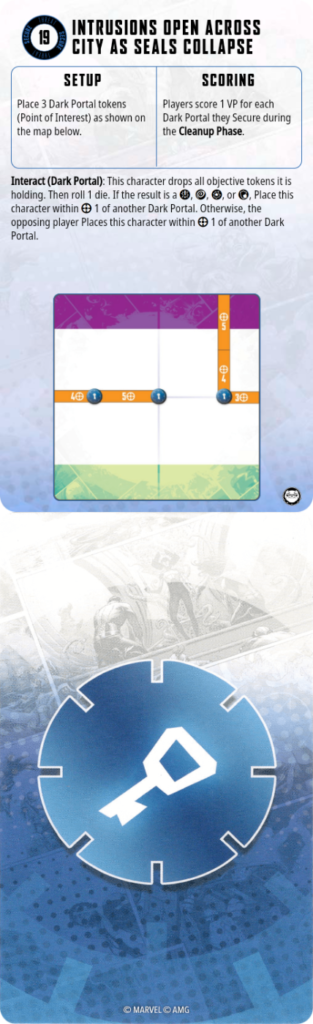
Map C
This isn’t a Pay to Flip even though it has an interact ability.
You have to drop any extracts you have to teleport.
You can interact with every secure token once per activation so you can: teleport, miss the roll, get placed to the third possible location by your opponent and then interact there. Either getting placed back to where you started or reaching your desired destination.
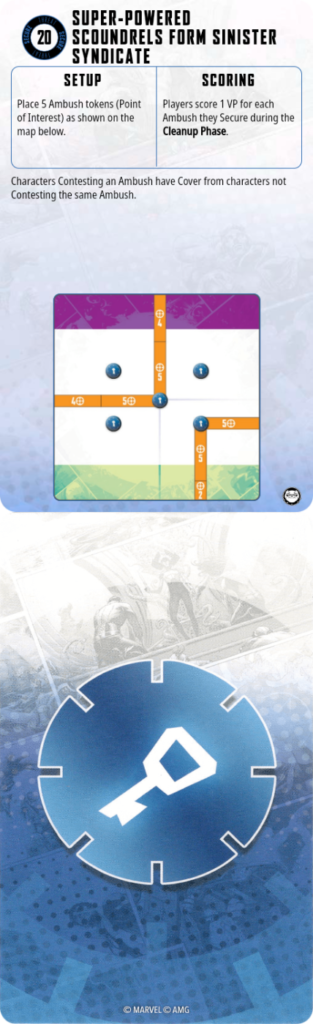
Map F
The cover granted by contesting an Ambush is not negated by the enemy character being within 2. They only ignore it of they contest the same Ambush.
And that’s all Crisis cards currently in the game.
One point about securing that is covered clearly in the core rules but it helps to remind ourselves of it: One healthy model trumps any number of enemy injured ones. Injured enemy models also have no effect on the difficulty of interact rolls on Pay to Flips, expect for SWORD base with doesn’t specify healthy enemy characters.
So to see who scored any given non P2F secure (or the Researcher):
Check who has more healthy characters contesting it.
If noone has any healthy characters contesting check who has more injured characters contesting it.
That’s all for today. Please comment if I’ve missed anything!
Cheers from Germany 🍻
Thanks very much for this helpful post! Lots of a little details in some of these crises that are not well understood.
I think I have one correction to add to your closing statement: “Injured enemy models also have no effect on the difficulty of interact rolls on Pay to Flips.” This is generally true except for Sword Base. The card just specifies that if a character is contesting, you have to roll to pay to flip it. So it could be either a Healthy or Injured character.
–Norbert
Thank you very much Norbert! 😊
I’ll add it to SWORD Base as it is a speciality of that crisis.